
Lesson planning isn’t exactly easy, even if you know the exact material you need to cover. After all, you will be teaching elementary students, and it’s critical that you make the lessons as fun as possible while teaching the necessary fundamentals.
So, in this guide, you will discover lesson plans you can learn right away. And while we’re at it, we’ll also cover the mindset behind planning a lesson so you can start coming up with your plans too.
Here we’ll look at an array of lesson plans for elementary school.
Found Sound Scavenger Hunt
It isn’t just instruments that produce pleasing sounds. Anything you can hit, or strike can make a sound, and can sometimes work quite amazingly, even in a professional musical context.
Ever seen a drummer playing his cases? I have, and it was mesmerizing how well it ended up working for an acoustic set (the band was taking a break from their heavier, electric set and playing a more stripped-down set).
The Found Sound Scavenger Hunt, therefore, can teach students some very important concepts around rhythm (keeping a steady beat), timbre (exploring the sound of non-instruments), and ultimately, creativity too (even professionals sometimes use found sounds, field recordings, and incorporate non-instrument objects in their recordings).
The scavenger hunt, therefore, is first and foremost an exercise in exploration. It’s about looking around the environment for things in the environment that aren’t instruments but could be used as such (in this case, objects that can be used as percussion).
Next, it’s an exercise in experimentation. Of course, the students will be using non-instrument objects, but it’s so much more than that. They also get to explore different articulations.
Objects can be struck, scraped, rubbed, and more, to produce a sound (depending on the object, of course).
It’s worth encouraging your students to explore objects made of a variety of materials too – cloth, plastic, glass, wood, clay, and so on.
It would also be wise, as a teacher, to monitor the activity as it’s unfolding, as you don’t want students using potentially dangerous objects in potentially dangerous ways. Other than that, though, you want the scavenger hunt to be free for all as much as possible.
Once objects have been found and experimented with, it’s time to work on playing a steady beat in concert. Since you will be leading the session, you can create a beat your students can follow, and as they feel more comfortable with the beat, let them take over completely.
This is such a creative lesson that can teach your students many important concepts simultaneously.
Steady Beats Vs. Unsteady Beats
It is key that elementary students learn the difference between steady beats and unsteady beats. Here is another fun lesson plan that can reinforce important concepts.
Steady Beats Vs. Unsteady Beats can be set up in a couple of ways. You can split the classroom in half and put them into teams. Or, if your classroom is small, you can pit the entire class against you, the teacher.
Once you’ve split your class into teams, it’s time to play a beat on an instrument (or multiple instruments). The beat can either be steady or unsteady. Mix it up as necessary, because the idea is to have your students guess whether the beat is steady or unsteady.
You could have the students write their answers on a piece of paper or even on the whiteboard once they’ve decided whether the beat played was steady or unsteady.
Of course, the goal of the game is to see who can get the most right answers. Whichever team ends up with the most points wins.
In preparation for this lesson, identify as many songs as you can featuring steady beats and unsteady beats. The more variety you have, the better. Look for some advanced examples too so you can make the examples increasingly harder to guess.
Create Your Own Beat Shapes
Drum notation essentially takes the same form as standard notation except that notes on the staff represent different parts of the drumkit to be struck (bass drum, floor tom, snare, ride, hi-hat, etc.).
Therefore, beats are usually notated in an otherwise “boring” way, with shapes that are the same size and spaced the same way.
Create Your Own Beat Shapes is an exercise where students get to be creative and bring their ideas to the table. They get to create their unique steady-beat shapes to help reinforce the concept.
Whether it’s drawing, coloring, or cutting out shapes, it’s up to the students to create new, compelling shapes.
Once the shapes have been created, you can tap out the rhythm while singing everyone’s favorite songs.
This is another lesson where students get to learn about steady beats but also get an outlet for creative expression. And what is music if not for creative expression?
Rhythm Puzzle
Rhythm is an especially important concept for elementary students. And there are many fun ways to teach it if you’re willing to do the looking.
In preparation for the Rhythm Puzzle activity, you’ll want to pick out a song, preferably a longer one. All the rhythms for the song should be written on a piece of paper. Or, if you can find it online, you could print out your rhythms in advance.
Once everything is on paper, you’ll want to cut up the song by measure, throw all the pieces into a hat or punchbowl, and mix them up.
The job of your students is to put the entire song back together.
If you want to make it even more challenging for your students, you could create a puzzle for another song and not tell your students what song it is.
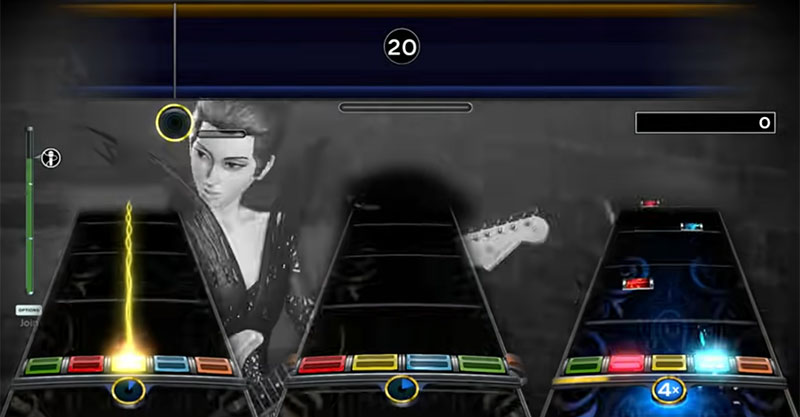
Rock Band
If you’ve ever thought of bringing video games to the classroom, here’s one that’s sure to be fun and educational – Rock Band!
The case could certainly be made that it’s derivative of another magical work, Guitar Hero, but the main difference with Rock Band is that in addition to game controllers shaped like guitars, you also get bass guitar and drums controllers. Thus, Rock Band.
The game is centered on holding down the right buttons and stroking them (“picking”) or in the case of drums, hitting the right pads in time with the beat.
The other educational aspect of a game like Rock Band is that the children get to learn about popular songs from the 70s up to the 2000s. Here are just some of the songs included in the game:
- “Black Hole Sun” by Soundgarden
- “Blitzkrieg Bop” by Ramones
- “Cherub Rock” by Smashing Pumpkins
- “Creep” by Radiohead
- “Detroit Rock City” by Kiss
- “(Don’t Fear) The Reaper” by Blue Öyster Cult
- “Enter Sandman” by Metallica
- “Gimme Shelter” by The Rolling Stones
- “Highway Star” by Deep Purple
- “Learn to Fly” by Foo Fighters
- “Sabotage” by Beastie Boys
- “Suffragette City” by David Bowie
- “Wanted Dead or Alive” by Bon Jovi
The only note of caution…? Well, we all know how addicting video games can be. And all the students in your class are going to be begging for their turn.
So, try to set the parameters first before diving headlong into the activity. If necessary, put the game in a separate room and have your students swap out after playing one or two songs.
Rock And Roll
This composing game is quite clever, and one well worth trying with your students as you’re teaching them note values.
In preparation for this lesson, bring paper, pencils, and dice. Or, have your students bring the paper and pencils, and you bring the dice.
To set up the activity, create a legend for each number of the die (one through six) and its corresponding note value. There isn’t a right or wrong way to do this (though you may want to ensure your students end up with even measures), but here’s an idea of how you could set this up:
- 1 – whole note
- 2 – half note
- 3 – quarter note
- 4 – eighth note
- 5 – quarter note rest
- 6 – eighth note rest
Students then roll the die and practice the art of notation, writing down each note value on their paper as they roll for them.
You can decide in advance for your students how many times you want them to roll the dice but ensure that it’s enough times for them to have a composition of eight to 16 bars (i.e., something they can work with).
Then, have your students examine and evaluate what they’ve notated. Encourage them to edit and revise the composition to turn it into their masterpiece.
This lesson is perfect for teaching note values and even compositional skills.
Guess The Instrument
While some of the lesson plans provided here may not strictly fall under the curriculum you’re teaching, they can still work as supplementary lessons and help your students gain a firmer grasp of music.
This lesson is an excellent one for younger students, given their natural fascination for and interest in instruments.
The idea is to prepare recordings of various common instruments – guitar, piano, drums, bass guitar, saxophone, trumpet, violin, cello, flute, clarinet, recorder, and so on.
You’ll want to play these recordings for your students, maybe even multiple times.
Then, allow them to guess what instrument they’re hearing. You could even use separate recordings for the guessing game for an added challenge.
Give your students a chance to guess, and then show them a picture of the correct instrument (prepare pictures of relevant instruments in advance).
Compose A Christmas Melody
Nothing gets you into the holiday spirit like Christmas music. So, why not encourage your students to unleash their inner composer by helping them compose their own Christmas melody?
First, divide your classroom into small groups. You can do this yourself or assign leaders in your classroom, but monitor to ensure all your students are part of a group and are settled in.
There isn’t much you need to prepare for the lesson. Pencil, papers, and maybe percussive instruments. The goal is to get your students to think about what Christmas songs are about, what the lyrical content would be, what instruments would be used, and the like.
It can always help to paint the picture as you are developing the lesson. For example, “If it’s Christmas Eve, and we’re all sitting around by a warm fire and a Christmas tree enjoying a hot chocolate with marshmallows, what instruments would we use to express that feeling?”
If you like, you can demonstrate how bells, a tambourine, or a xylophone would be used to express a feeling as a rhythm or melody. Give your students an idea of the types of instruments that would be used in a Christmas song.
Then, give your groups a chance to go to work on their songs. Visit each group to see how they’re doing and see if you can provide them with any additional guidance. If certain groups are struggling more than others, it’s okay to spend more time with them.
Once the groups have finished writing their Christmas melody / song, record each. If you have recording equipment, you could use a proper microphone to capture the performance, but in the absence of more sophisticated gear, you could simply use your smartphone.
Listen to each performance, and make observations about the instruments they used, whether certain instruments came in and out, the lyrics they used, whether the lyrics rhyme, etc. Making these observations together can speed up the learning of your students.
Phone Number Melody
The goal of this lesson is to introduce your students to the C major scale. For most students, it’s the first scale they ever learn, and for good reason – on the piano (and other keyboard instruments), the C major scale is made up entirely of white keys. This makes it easy to learn and build on.
By the end of the lesson, your students should be able to write the C major scale and be able to compose a simple melody using their own phone numbers.
Paper, pencils, a piano or xylophone, and simple percussive instruments (like shakers, maracas, or tambourines) will be required for this lesson. The percussive instruments would be used to create a beat for the melodies your students come up with.
To start this lesson off, you’ll first need to show your students what a “C” note is and how to find it on a piano or xylophone. If time permits, let all your students come up to the piano and play a C, and see if you can get them to play a different C (in a different octave) each time.
Having shown them the C note, it’s time to show them the C major diatonic scale. It is technically a seven-note scale (C, D, E, F, G, A, B) but playing the full octave makes the scale sound more complete (i.e., finishing off with the C an octave higher).
To keep the lesson simple, you can explain to your students that there are eight notes in the scale.
Again, once you’ve demonstrated the scale, have several students come up to perform the scale themselves. Encourage them to play it in ascending and descending fashion. Again, encourage each student to play the scale in a different octave so the concept lands.
Now, create a legend on your blackboard or whiteboard. Each note in the scale receives a numeric value. C is one, D is two, E is three, etc. Have your students copy the scale to their piece of paper exactly as you’ve written it.
Since there aren’t nine notes in the scale, you could create the rule that nine means to play one and eight together (C octave). If your students have a zero in their number, they can use the B below middle C.
Play the C major scale once more for your students and let them know that they will be composing a melody using their phone numbers. You could demonstrate by using the school’s phone number or another number of your choosing and add it to the board.
Have the students copy this melody to their papers too and demonstrate the melody on your instrument.
Now, your students get to create a melody using their home phone numbers. Once they’ve completed the task, have your students play their melodies for the entire class.
If you have time left over, you can have your students try different numbers. Or, you could have your students work in groups to build their melodies into complete songs.
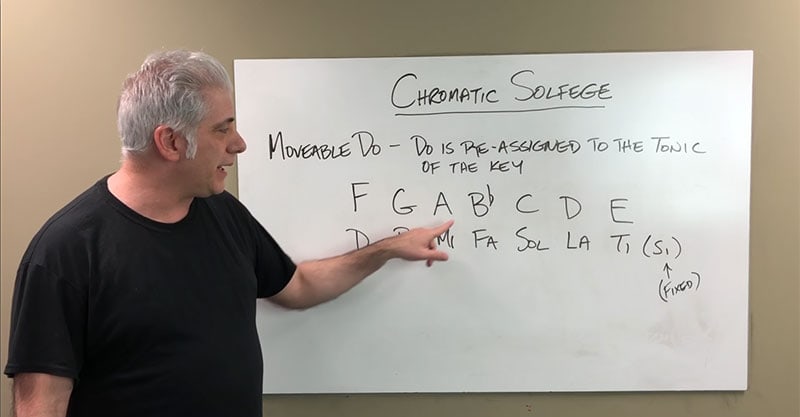
Solfège Hopscotch
Solfège is an important concept for grade schoolers and one that can be taught in many ways. The reason it’s an important concept is because it’s a proven method for teaching aural skills, pitch, and even sight-reading basics.
Solfège hopscotch adds a physical element into the equation, making it even more fun for students to learn their Do Re Mi’s.
In preparation, you will need to create hopscotch-style squares on the floor. The great thing about this activity is that you can adapt it to the grade you’re teaching. If your students don’t know Sol La Ti yet, for instance, you can limit your labels to Do, Re, Mi, Fa.
Either way, you will need to label the squares on the floor with the appropriate solfège.
Tossing an object over to a square and hopping over to it is given (that’s how hopscotch works!). Once the object has been picked up, though, they need to sing all the pitches on the way back.
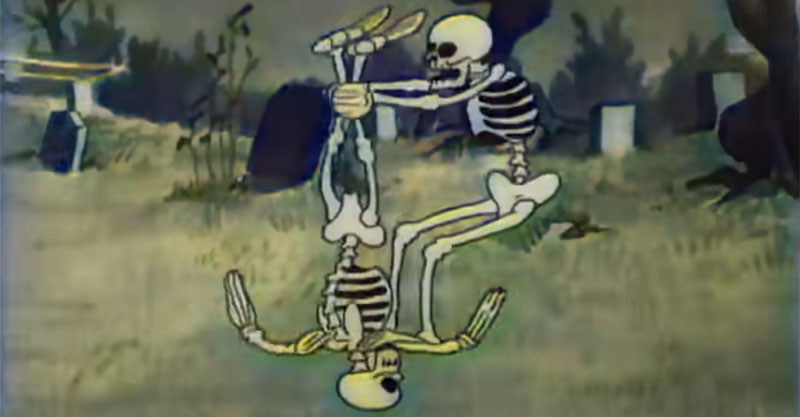
Haunted House
This is a fun lesson to explore one’s creativity more than anything else, and it’s probably best suited to third graders and above.
In this lesson, you’ll be exploring with your students what makes a song sound scary. Is it the lyrics, and if so, what kind of words are used? Is it the way the melody or chords are composed, or the specific rhythm used, and if so, what is it about the song structure that makes it scary?
Naturally, you don’t want to spook your students. So, find a song that’s appropriate to the situation.
Andrew Gold’s “Spooky Scary Skeletons” or “The Addams Family” are practically tailor-made for the occasion.
Listen to the song with your class. Encourage your students to listen for the rhythm as well as the instruments and lyrics used. You can also put all the lyrics up on a board so your students can see what words were used and have them sing along to the song once or twice to get the feel.
Ask your students what they felt made the song spooky. Was it the words? The instruments? The melody? Something else? Have them speculate on words they could use in their songs.
With a better understanding of what made the song spooky, it’s time to pair your students up in groups of two and have them come up with a spooky sound to add to the song. Have them look for sounds that complement the words being used in the song (laugh, shivers, shrieking, screech, shake, shutter, etc.).
Have each group share their sounds and why they felt it would work. Offer feedback to each pair as you explore the sounds together.
Play the song again, and have the children make the sounds they came up with at specific parts of the song. Then, explore together whether the sounds enhanced the song, and what difference they made. Did these sounds make the song scarier?
This is a creative exercise that can be a lot of fun and the conclusions you draw from it could be quite surprising too.
Tea & Coff-ee
Tea & Coff-ee is another lesson plan revolving around rhythm. While the setup is simple, you can derive many variations from it, teaching your students many rhythmic patterns (from familiar songs) in the process.
To get this lesson plan underway, split your class into two. The first group gets to be Tea and the second Coff-ee. Tea gets to be a quarter note, while Coff-ee gets to be two eighth notes.
Get the first group to say “Tea” out loud. Then, get the second group to say “Coff-ee” out loud. If necessary, demonstrate the difference in rhythm by clapping it out.
Then, get a beat going – “Tea,” “Coff-ee,” “Tea,” “Coff-ee,” etc. It shouldn’t take your students very long to catch on, and before you know it, you should have a steady beat going.
That’s a good time to start introducing new beverages. Coca-Cola, for example, could represent four eighth notes. Cream Soda could be a quarter note and two eight notes (in other words, the same rhythm as “Tea Coff-ee.”
In addition to concepts revolving around rhythm and steady beats, you can also introduce your students to musical notation and show them how to write rhythms with quarter notes and eighth notes.
Watch A Movie
Need a lazy day lesson plan? Hey, we know those weekends can sometimes be anything but restful…
Here’s one lesson plan that, while it may appear simple, can end up inspiring your students and teaching them a lot about how music is used to convey emotion in the film medium.
So, prepare an age-appropriate movie, like The Wizard of Oz. Instruct your students to watch, paying careful attention to how music is used to enhance a scene (use simpler language than that, of course).
If you don’t have much time, then of course you could handpick a few segments from the film to show your students.
Once you’re done watching the film or clips, ask your students what they noticed. Did they notice any connections between what was happening on screen and the music used? Did they notice how certain tracks made them feel?
From there, you can take this lesson in any direction you want. You could make observations and call it a day, or you could teach on the rhythms used, solfège, composition, or link it to anything else you’re having your class work on right now. Enjoy!
Best Music Lesson Plans For Elementary, Final Thoughts
Remember – if you’re ever out of lesson plans, review what your students need to learn. Then, think about the many games you’ve played. Many simple games can be easily combined with – or adapted to – musical concepts. It’s just a matter of letting your imagination run wild.
Some experiments may fail, but that’s okay. You can always try again. There are many ways to solve a problem, not just one.
We wish you all the best on your teaching journey.